In this Tutorial you will learn how to create Margins and Padding. First off I better explain just what Padding and Margins are and how they differ. Padding is the white space inside the border and the margins is the whitespace outside the border allowing you to separate your box from surrounding things on your page.
Step 1: The first thing you are going to want to do is set up a style sheet for your page. You will want to input this in the head of your page:

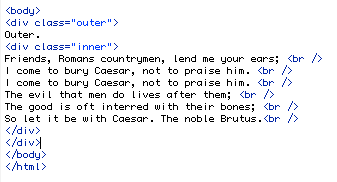
Step 2: The second thing that you will need to do is apply the style sheet that you set up in your body for your outer div and inner div, so that it knows which text you want in each. So that should look like this:
After you input the correct CSS code your page should look something like this:
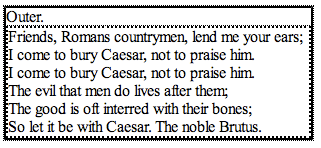
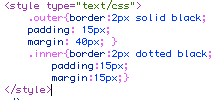
Step 3: So you can see in the image that the inner div goes right up to the edge of the outer div. To change that just adjust the numbers in the style sheet. An example would be something like this:
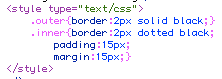
Doing so would then change your to look something like this:
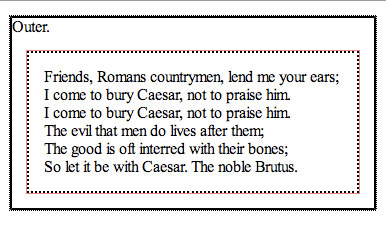
So you can see by changing the padding and margins it created space between the border of the inner div and the text inside the inner div using padding. It also created space between the border of the inner div and the border of the outer div using margin.
Step 4: With this next step I am going to add some margin and padding to the outer div too. You will basically do the same thing that you did with the inner div but this time adding space to the outer div margin and padding. An example would be:
So your div should now look like this: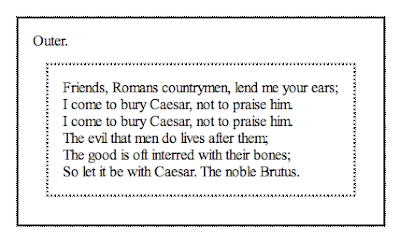
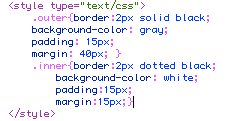
Step 5: The fifth and final step you can add color to the div if you would like. Again just by adjusting style sheet. Simply adding a background color. For example you could try something like this:
So your final div should now look like this: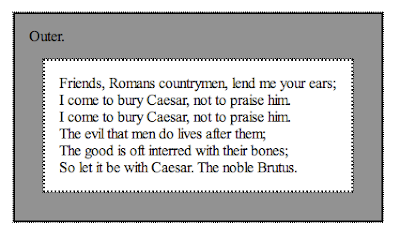
Congratulations! You are now a padding and margin genius! Now go try it yourself.
No comments:
Post a Comment